
Blog
Read our blog to get the latest news and tips in managing your social media.

How to download a Facebook video
With millions of users using it daily, Facebook is among the most widely used social media sites in the world. Facebook's video content, which can range from entertaining kitten videos to educational material, is one aspect that sets it apart from other social media platforms. But because Facebook doesn't offer a download option for its films, many users have trouble figuring out how to save the videos they like. This article will demonstrate how simple it is to download Facebook videos.
Method 1: Downloading Facebook videos from the website
- Open Facebook and find the video you want to download.
- Right-click on the video and select "Show video URL".
- Copy the URL of the video.
- Open a new tab and go to the website "fbdown.net".
- Paste the video URL into the text box on the website and click on "Download".
- Choose the quality and format of the video you want to download.
- Click on "Download" again to start the download process.
The video will be downloaded and saved to your device.
Method 2: Using a browser extension
- Open your browser and search for a video downloader extension.
- Choose a reliable extension and install it on your browser.
- Open Facebook and find the video you want to download.
- Click on the video downloader extension icon on your browser.
- Choose the quality and format of the video you want to download.
- Click on "Download" to start the download process.
Method 3: Using a mobile app
- Download a video downloader app from your app store.
- Open Facebook and find the video you want to download.
- Copy the URL of the video.
- Open the video downloader app and paste the URL into the text box.
- Choose the quality and format of the video you want to download.
- Click on "Download" to start the download process.
The video will be downloaded and saved to your phone's camera roll or gallery.
Note:
These techniques make it simple to download Facebook videos and enjoy them whenever you want without an internet connection. It's crucial to keep in mind that not all Facebook videos can be downloaded due to copyright regulations. Always check to see if you have permission before downloading and using a video.
Importance of having an Instagram Business Account
Any business today must have a social media presence due to the fast-paced nature of the digital world. With more than 1 billion monthly active users, Instagram has emerged as one of the most well-liked and frequently used social media sites. You are losing out on a lot of prospective clients if you own a business or work in marketing and haven't yet set up an Instagram business account. You should have an Instagram business account for the following reasons:
Insights and Analytics:
The ability to access insights and data is among the most important advantages of having an Instagram business account. You may use Instagram to get detailed information on your followers and your posts, which can aid in your data-driven decision-making. Metrics like impressions, reach, engagement, and more are available. You may adapt your content and approach to better appeal to your audience by using this information to better understand the actions and interests of your target market.
Advertising Options:
The advertising choices available on Instagram are some of the most sophisticated and successful in the market. You can run advertisements as a business account that target particular demographics, interests, behaviors, and more. You can reach a larger audience and increase leads and sales with Instagram advertising.
Shopping Feature:
A shopping feature on Instagram enables companies to sell their goods directly from their profile. Businesses can utilize this feature to tag their items in posts and stories, making it possible for consumers to click on the tags and buy the products directly from the app. Businesses may more easily approach new clients and increase sales thanks to this tool.
Increased Visibility:
Having an Instagram business account can increase your visibility and reach. With a business account, you can use hashtags to make your content more discoverable to new audiences. Additionally, Instagram's Explore page features content from accounts that users may not follow, making it easier for businesses to reach new users.
Credibility:
Having an Instagram business account can give your business credibility and legitimacy. With a business account, you can add important information about your business, such as your address, phone number, and email address. This information can help users find and contact your business, which can increase trust and credibility.
Finally, having an Instagram business account can help your company in a variety of ways. Instagram may help you reach more people and increase sales by offering useful information, advertising opportunities, and greater visibility. Create an Instagram business account now, if you haven't already, to start gaining advantages.

How to switch your Facebook page from new experience back to classic
As Facebook continues to make changes to its platform, users are often faced with new features and experiences that they may or may not be comfortable with. One of the most recent changes is the introduction of the new page experience, which has left many users wondering how to switch back to the classic version.
Why switch back to classic?
The new page experience brings with it a range of new features and design elements that are intended to make it easier for businesses to connect with their audience. However, many users have found the new design to be confusing and difficult to navigate, especially if they were used to the classic version of the page.
One of the main reasons to switch back to the classic version is familiarity. If you have been using Facebook for a long time, you may have become accustomed to the classic page layout and find it easier to use. Additionally, if you have a lot of content on your page, switching back to the classic version can make it easier to manage and organize.
Pros and cons of switching back to classic
Pros:
1. Familiarity: If you have been using Facebook for a long time, the classic page layout will be familiar to you.
2. Easier to manage: The classic version of the page is often easier to manage and organize, especially if you have a lot of content.
3. Less confusing: Many users have found the new page experience to be confusing and difficult to navigate.
Cons:
1. Missing out on new features: By switching back to the classic version, you may miss out on some of the new features that are available in the new page experience.
2. Less modern: The classic version of the page may feel less modern and up-to-date compared to the new page experience.
3. Not supported in the future: Facebook may eventually phase out the classic version of the page, so switching back may not be a long-term solution.
How to switch back to classic
If you have decided to switch back to the classic version of the page, the process is relatively simple. Here are the steps you need to follow:
1. Go to your Facebook page and click on the settings icon in the top right-hand corner.
2. Select "Switch to Classic Facebook" from the dropdown menu.
3. Confirm that you want to switch back to the classic version.
4. Your page will now be switched back to the classic version.
In conclusion, switching back to the classic version of your Facebook page can be a good option if you find the new page experience to be confusing or difficult to navigate. However, it is important to consider the pros and cons before making the switch, as you may miss out on some of the new features that are available in the new page experience. Ultimately, the decision to switch back to classic will depend on your personal preferences and how you use your Facebook page.
How to get Twitter verified badge in Nigeria
Twitter verification is a process that verifies the authenticity of a Twitter account. This process is also known as getting the blue badge (for personalities). Businesses and organisations are usually represented with the gold badge while government organisations are represented with the silver badge. The verified badge provides credibility to the account and helps to establish trust among followers. It is especially important for businesses, public figures, and journalists. In Nigeria, getting the Twitter verified badge is a highly sought-after achievement, as it helps to establish authority and authenticity in the online community. In this article, we will discuss the steps to get the Twitter verified badge in Nigeria.
Step 1: Meet the eligibility criteria
Before applying for the verified badge, ensure that your account meets the eligibility criteria. To be eligible for the Twitter verified badge, your account must meet the following requirements:
- Your account must be active and in good standing.
- Your account must have a complete profile, including a profile picture, bio, and header image.
- Your account must have a confirmed email address and phone number.
- Your account must have been active for at least six months.
- Your account must have a history of regular tweets.
Step 2: Gather supporting documents
To support your application, you need to gather documents that prove your identity and authenticity. The following documents are required for verification:
- A government-issued ID such as a passport, driver’s license or national ID card.
- A business license or tax identification number (TIN) for businesses.
- An article or publication that features your work for journalists.
Step 3: Apply for verification
Once you have gathered all the necessary documents, you can apply for verification. The application process is simple and can be completed in a few steps:
- Log in to your Twitter account and go to the verification request form.
- Select the account type (personal or business) and enter the required information.
- Upload the required documents and submit your application.
Step 4: Make Payment
Step 5: Wait for a response
After submitting your application, you will need to wait for a response from Twitter. The verification process can take several weeks, and Twitter may contact you for further information during this time. If your application is successful, you will receive a notification and the blue verified badge will appear on your profile.
Tips for a successful verification application:
- Ensure that your profile is complete and up-to-date before applying for verification.
- Use your real name and profile picture on your account.
- Regularly tweet and engage with your followers to demonstrate your activity and authenticity.
- Provide accurate and up-to-date information on your application.
- Be patient and wait for a response from Twitter.
Conclusion:
Getting the Twitter verified badge in Nigeria is an achievement that can help to establish credibility and authenticity in the online community. By following the steps outlined in this article, you can increase your chances of getting the verified badge. Remember to meet the eligibility criteria, gather supporting documents, apply for verification, and be patient while waiting for a response from Twitter. With a verified badge, you can establish trust and credibility among your followers and build a strong online presence.
How to connect your YouTube channel to Google News
In today's digital age, YouTube has become one of the most popular and powerful mediums for video content creation and distribution. With over 2 billion active users and millions of channels, YouTube offers an incredible opportunity for content creators to reach a vast audience and build a loyal following.
However, in order to fully leverage the potential of your YouTube channel, it's important to connect it to Google News. This can significantly increase your channel's visibility and reach, and help you establish yourself as a credible source of information in your niche.
So, how do you connect your YouTube channel to Google News, and why is it important? Let's dive in.
What is Google News?
Google News is a news aggregator service that collects and curates news stories from around the world. It's designed to provide users with a personalized news experience, based on their interests and browsing history.
Google News uses algorithms to analyze and classify news content from thousands of sources, including newspapers, websites, and blogs. It then categorizes and presents the content in a user-friendly format, making it easy for users to discover and engage with news stories that are relevant to them.
Why is it important to connect your YouTube channel to Google News?
Connecting your YouTube channel to Google News can have several benefits, including:
- Increased visibility: Google News is a highly-trafficked website, and being featured on it can significantly increase your channel's visibility and reach. This can help you attract new viewers and subscribers, and ultimately grow your channel's audience.
- Credibility: Being featured on Google News can help establish you as a credible source of information in your niche. This can enhance your reputation and increase your authority, making it easier for you to attract sponsors and advertisers.
- Improved engagement: Google News users are often looking for high-quality content that provides them with valuable information. By connecting your YouTube channel to Google News, you can attract viewers who are interested in your niche and who are more likely to engage with your content.
- Traffic: Being featured on Google News can also drive traffic to your YouTube channel. This can help you increase your watch time and ad revenue, and ultimately grow your channel's monetization potential.
How to connect your YouTube channel to Google News
Now that we've established why it's important to connect your YouTube channel to Google News, let's walk through the steps involved in doing so.
Step 1: Verify your website with Google News
The first step is to verify your website with Google News. This involves adding a special meta tag to your website's HTML code that confirms ownership of the site.
To do this, you'll need to follow the instructions provided by Google News in their verification guide. This will involve creating a Google News Publisher Center account and submitting your website for verification.
Step 2: Connect your YouTube channel to your website
Once your website is verified, you'll need to connect your YouTube channel to it. This involves linking your YouTube channel to your website in the Google News Publisher Center.
To do this, navigate to the "Content" tab in the Publisher Center and click on "Add Content." Select "YouTube Channel" from the dropdown menu, and enter your channel's URL. You'll then need to authorize Google to access your channel's data.
Step 3: Optimize your channel for Google News
Finally, you'll need to optimize your channel for Google News. This involves ensuring that your channel meets Google News' content and technical guidelines.
Some of the key guidelines to keep in mind include:
- Publish high-quality content that is relevant and timely.
- Use descriptive and accurate titles and descriptions.
- Provide context and background information for your videos.
- Optimize your videos for search engines by including relevant keywords in your titles and descriptions.
- Ensure that your channel and videos are technically sound.
If you find this post helpful, please share and recommend to friends.
How to upgrade your Snapchat to creator's account
Snapchat is one of the most popular social media platforms, with millions of users around the world. While most people use the app to share pictures and videos with friends, many others use it to build their personal brands and connect with fans. If you're interested in taking your Snapchat game to the next level, upgrading your account to a creators account is a great way to do it. In this article, we'll walk you through the steps you need to take to upgrade your Snapchat account to a creators account.
Step 1: Meet the eligibility requirements
To upgrade your Snapchat account to a creators account, you need to meet the eligibility requirements. These requirements include:
- Having at least 50,000 Snapchat views in the last month
- Being over 18 years old
- Having a verified email address
- Having an active Snapchat account
If you meet these requirements, you're ready to move on to the next step.
Step 2: Apply for a creators account
To apply for a creators account, you'll need to fill out a form on Snapchat's website. Here's how:
- Go to the Snapchat creators website at https://www.snapchat.com/creators.
- Scroll down to the "Get Started" section and click the "Apply Now" button.
- Fill out the form with your information, including your Snapchat username, email address, and information about your account and content.
- Submit the form.
Snapchat will review your application and let you know if you've been approved for a creators account.
Step 3: Set up your creators account
Once you've been approved for a creators account, you'll need to set it up. Here's what you need to do:
- Log in to your Snapchat account.
- Go to your profile by tapping your Bitmoji in the top left corner of the screen.
- Tap the gear icon in the top right corner of the screen to access your settings.
- Scroll down to the "More Information" section and tap "Creators".
- Follow the prompts to set up your creators account, including adding your payment information and agreeing to the terms and conditions.
Step 4: Start creating content
Now that your creators account is set up, it's time to start creating content. Here are some tips for creating engaging content on Snapchat:
- Keep it short and sweet: Snapchat is all about short-form content, so keep your videos and pictures short and to the point.
- Be creative: Experiment with different filters, lenses, and effects to make your content stand out.
- Be authentic: Snapchat users love authenticity, so don't be afraid to show your personality and be yourself.
- Engage with your audience: Respond to messages and comments from your fans to build relationships and create a community around your content.
Step 5: Grow your audience
As you create content on your creators account, you'll want to focus on growing your audience. Here are some tips for doing that:
Promote your account on other social media platforms: Share your Snapchat username on other social media platforms to attract new followers.
- Use hashtags: Use relevant hashtags on your posts to make it easier for people to find your content.
- Collaborate with other creators: Collaborating with other creators can help you reach new audiences and gain more followers.
- Offer exclusive content: Consider offering exclusive content to your Snapchat followers to give them a reason to follow you.
Upgrading your Snapchat account to a creators account is a great way to take your social media game to the next level. By following these steps and putting in the work to create engaging content and grow your audience, you can become a successful Snapchat creator and build your personal brand.

SMMBirds Graphics Design Contest
Are you a talented graphic designer looking for an opportunity to showcase your skills and win some cash? Look no further! SMMBirds is hosting a graphic design contest with a prize of ₦25,000 for the winner. Here are the details on how to participate:
Step 1: Create Your Design
Design a flyer that represents our SMM business. We want to see your creativity and design skills. Make sure to follow our brand guidelines, which can be found on our website at smmbirds.top. Your design should be original, unique, and visually appealing. You can use any design software to create your flyer.
You can use our logo/watermark below:


Step 2: Register on Our Website
To participate in the contest, you need to register on our website smmbirds.top. It's easy and free to register. Make sure to use the same username on our website when you submit your design on our Facebook page.
Step 3: Submit Your Design on Facebook
Once you have completed your design and registered on our website, it's time to submit your entry. Post your design on our Facebook page at @thesmmbirds. Make sure to include your username on our website in the description of your post.
Step 4: Promote Your Entry
Promote your entry on your social media channels to get more likes, shares, and comments. The more engagement your entry gets, the higher your chances of winning. Make sure to use the hashtag #SMMBirdsDesignContest when promoting your entry on social media.
Step 5: Winner Announcement
The contest starts on March 11th and ends on March 25th. After the contest period, our team of judges will review all entries and select the winner based on creativity, originality, and how well the design represents our SMM business. The winner will be announced on our Facebook page on March 31st.
So what are you waiting for? Show us your design skills and stand a chance to win ₦25,000! Remember to follow all the steps and guidelines to increase your chances of winning. Good luck!
Our YouTube monetisation approval guide
YouTube is one of the most popular platforms for video sharing and has become a great way for content creators to earn money through their content. However, getting approved for YouTube monetization is not always easy. In this article, we'll go over some of the steps you can take to increase your chances of getting approved for YouTube monetization.
1. Meet the eligibility requirements
The first step in getting approved for YouTube monetization is to make sure you meet the eligibility requirements. These requirements include having at least 1,000 subscribers and 4,000 watch hours in the past 12 months, as well as following YouTube's community guidelines and terms of service.
2. Create high-quality content
One of the most important factors in getting approved for YouTube monetization is creating high-quality content. This means creating videos that are engaging, informative, and entertaining. You should also make sure your videos are well-edited and have good production value.
3. Optimize your videos for search
Another important factor in getting approved for YouTube monetization is optimizing your videos for search. This means using keywords in your titles, descriptions, and tags to help your videos show up in search results. You should also make sure your videos have engaging thumbnails and that your channel has a clear focus.
4. Engage with your audience
Engaging with your audience is an important part of building a community on YouTube. This means responding to comments, creating polls and Q&As, and encouraging your viewers to share your videos. Building a strong community can help increase your watch time and engagement, which can help you get approved for YouTube monetization.
5. Follow YouTube's policies and guidelines
In order to get approved for YouTube monetization, you must follow YouTube's policies and guidelines. This means avoiding copyrighted material, hate speech, and other types of content that violate YouTube's rules. You should also make sure your content is suitable for all audiences and does not contain any explicit or adult material.
6. Apply for monetization
Once you've met the eligibility requirements and followed YouTube's policies and guidelines, you can apply for monetization. To do this, go to your YouTube Studio dashboard and click on the "Monetization" tab. From there, you can submit your application and wait for YouTube to review it.
7. Be patient
Finally, it's important to be patient when waiting for YouTube to review your application. It can take several weeks or even months for YouTube to review your application and make a decision. During this time, continue to create high-quality content and engage with your audience.
In conclusion, getting approved for YouTube monetization takes time and effort, but it is possible. By meeting the eligibility requirements, creating high-quality content, optimizing your videos for search, engaging with your audience, following YouTube's policies and guidelines, applying for monetization, and being patient, you can increase your chances of getting approved for YouTube monetization and earning money from your content.

How to bulk delete tweets on Twitter
Social media has become an integral part of our lives, and Twitter is one of the most popular social media platforms used by millions of people worldwide. Twitter enables users to share their thoughts, ideas, and experiences with others through short messages called tweets. However, over time, users may accumulate hundreds or even thousands of tweets, which can become overwhelming and cluttered. In such cases, bulk deleting tweets becomes a necessary action. In this article, we will discuss how to bulk delete tweets efficiently.
Step 1: Backup your tweets
Before you begin to delete your tweets, it is essential to make a backup of your tweets. This will ensure that you have a copy of your tweets in case you delete something important or regret deleting all of them. There are several third-party applications available, such as TweetDownload, that allow you to download your tweets.
Step 2: Use Twitter Archive
Twitter has an archive feature that enables users to access all their tweets. To access your Twitter archive, go to your Twitter settings, click on "Your Twitter Data," and select "Download an Archive of your Data." Once the archive is downloaded, extract the files and open the "tweets.csv" file in a spreadsheet program like Microsoft Excel.
Step 3: Use a third-party app to bulk delete tweets
Several third-party applications are available that allow users to bulk delete tweets. Some of the popular options include TweetDeleter, TwitWipe, and TweetEraser. These applications are easy to use and allow you to select and delete multiple tweets simultaneously. However, keep in mind that some of these applications may require you to pay a fee to delete a large number of tweets.
Step 4: Manually delete tweets
If you do not want to use a third-party application to delete your tweets, you can manually delete your tweets. However, this process can be time-consuming, especially if you have a large number of tweets. To manually delete your tweets, go to your Twitter profile, find the tweet you want to delete, and click on the three dots icon. Then, select "Delete Tweet" from the drop-down menu. Repeat this process for all the tweets you want to delete.
Step 5: Repeat the process
If you have thousands of tweets, it may take several attempts to delete all your tweets. Repeat the process until all your tweets are deleted.
In conclusion, bulk deleting tweets can be a daunting task, but with the right tools and strategies, it can be accomplished efficiently. Remember to backup your tweets before deleting them, use a third-party app if necessary, and repeat the process until all your tweets are deleted. Deleting your tweets can help declutter your Twitter profile and protect your privacy.
How to find and copy your Tiktok profile link
TikTok has become one of the most popular social media platforms in recent years, with over a billion active users worldwide. TikTok allows users to create and share short videos, ranging from lip-syncing to comedy skits to dance performances. If you're a TikTok user, you may want to share your profile link with your friends, family, or fans. Here's how to copy your TikTok profile link.
Step 1: Open TikTok App
Open the TikTok app on your phone. Make sure you are signed in to your TikTok account.
Step 2: Go to your Profile
Once you're on the app's main page, click on the "Profile" icon at the bottom right corner of the screen. This will take you to your profile page.
Step 3: Click on the Three Dots
On your profile page, click on the three dots in the upper right corner of the screen. This will open up a menu of options.
Step 4: Click on "Share Profile"
In the menu that pops up, click on "Share Profile." This will bring up a menu of options for sharing your TikTok profile.
Step 5: Copy your Profile Link
In the "Share Profile" menu, you will see a link to your profile. Click on the "Copy Link" option to copy your profile link to your device's clipboard.
Step 6: Share your Link
Now that you have copied your TikTok profile link, you can share it with your friends, family, or fans. You can send it via text, email, or any other messaging platform. You can also post it on your other social media accounts, like Instagram or Twitter.
In conclusion, copying your TikTok profile link is a simple process that can be done in just a few clicks. With your profile link, you can share your TikTok content with a wider audience and connect with more people on the app. So go ahead and copy your profile link, and share your TikTok creations with the world!

How to change your Facebook page username
Facebook is a popular social media platform with billions of users worldwide. It offers a variety of features and tools to help individuals, businesses, and organizations connect with their audience. One of the essential features on Facebook is the username, which is a unique identifier that helps people find your page more easily. In this article, we will guide you on how to change your Facebook page username.
Step 1: Login to Your Facebook Account
The first step is to log in to your Facebook account using your email address or phone number and password.
Step 2: Access Your Facebook Page
Once you have logged in to your account, navigate to the page whose username you want to change. You can access your page by clicking on the Pages option on the left-hand side of your Facebook profile.
Step 3: Click on Edit Page Info
Once you are on your Facebook page, click on the "Edit Page Info" button located at the top right corner of the page.
Step 4: Change Your Username
After clicking on "Edit Page Info," you will see various options, including the username option. Click on the "Edit" button next to your current username, and a new window will pop up.
Step 5: Enter a New Username
In the new window, enter your desired username in the available field. Make sure you choose a unique username that represents your brand or page. Facebook will automatically check the availability of the username as you type. If the username is available, Facebook will notify you by displaying a green tick next to it.
Step 6: Click on Create Username
Once you have entered your desired username, click on the "Create Username" button to save the changes. Facebook may ask you to enter your password for security reasons.
Step 7: Confirm the Changes
After you have clicked on "Create Username," Facebook will ask you to confirm the changes. Review the username and click on the "Confirm" button if you are satisfied. Facebook will notify you that the username has been changed successfully.
Note: It is important to note that Facebook only allows you to change your page username once every 60 days. Therefore, it is essential to choose a username that you will be happy with for an extended period.
In conclusion, changing your Facebook page username is a straightforward process that can be done in a few simple steps. Make sure you choose a unique and memorable username that represents your brand or page. By following these steps, you can easily change your Facebook page username and improve your online presence.
Everything you need to know about Mastodon
Mastodon is a decentralized social network that has been gaining popularity in recent years. Unlike traditional social networks, Mastodon operates on a distributed network of servers, which means that users can communicate with each other regardless of which server they are on. In this article, we'll go over everything you need to know about Mastodon, from its history and features to how to get started on the platform.
History of Mastodon
Mastodon was created in 2016 by Eugen Rochko, a software developer from Germany. Rochko was dissatisfied with the way that traditional social networks like Twitter and Facebook operated, with their centralized systems that gave too much power to the companies behind them. He wanted to create a social network that was decentralized, community-owned, and focused on privacy and user control.
Rochko's solution was Mastodon, which is named after an extinct elephant-like creature that was known for its long tusks. The platform quickly gained popularity among the tech community, and today there are over 2 million users across the Mastodon network.
Features of Mastodon
Mastodon offers many of the same features as traditional social networks, including the ability to post text, images, and videos, follow other users, and engage with their content through likes, shares, and comments. However, Mastodon also has some unique features that set it apart from other social networks:
Federated network
As mentioned earlier, Mastodon operates on a federated network of servers, which means that users can communicate with each other regardless of which server they are on. Each server is independently owned and operated, and users can choose which server they want to join or even create their own server.
Content warnings
Mastodon allows users to use content warnings for posts that contain sensitive or potentially triggering content. This feature allows users to opt-in to view the content and gives them control over what they see in their feeds.
No ads or algorithms
Mastodon does not display ads or use algorithms to curate content. Instead, users see posts from the people they follow in chronological order.
Customizable interface
Users can customize the Mastodon interface to suit their preferences. This includes changing the color scheme, font size, and layout of the platform.
How to get started on Mastodon
If you're interested in joining Mastodon, the first step is to choose a server to join. Mastodon has a list of recommended servers on its website, or you can search for a server based on your interests or location. Once you've chosen a server, you can create an account and start using Mastodon.
When you join Mastodon, it's a good idea to spend some time exploring the platform and finding people to follow. Mastodon has a feature called the "local timeline," which shows all the posts from users on the same server as you. This can be a great way to discover new people to follow and get involved in the community.
Mastodon also has a strong focus on privacy and security. You can control who sees your posts, and Mastodon uses end-to-end encryption to protect your data. However, it's still a good idea to be cautious when sharing personal information online.
Conclusion
Mastodon is a decentralized social network that offers an alternative to traditional social networks like Twitter and Facebook. With its federated network, content warnings, and customizable interface, Mastodon provides users with more control over their social media experience. If you're looking for a social network that values privacy, user control, and community ownership, Mastodon might be the platform for you.

Why we decided to adopt Coinbase as a payment gateway
Social media marketing (SMM) has become a crucial aspect of digital marketing strategies for businesses worldwide. As social media platforms continue to evolve and expand, businesses are increasingly relying on SMM services to reach and engage with their target audience. With the growing demand for SMM services, it has become imperative for service providers to offer their clients secure and convenient payment options. This is where Coinbase, a leading cryptocurrency exchange, comes in.
At our SMM website, we have decided to adopt Coinbase as a payment gateway for several reasons. Firstly, Coinbase offers a safe and reliable payment option for our clients. With its state-of-the-art security features, Coinbase ensures that all transactions are secure and that client data is protected. Additionally, Coinbase's user-friendly interface makes it easy for clients to make payments and track their transactions.
Secondly, Coinbase supports multiple cryptocurrencies, which provides our clients with more payment options. By accepting cryptocurrencies such as Bitcoin, Ethereum, and Litecoin, we are able to offer our clients a more flexible payment method that is not limited to traditional currencies. This also means that clients can make payments from anywhere in the world without the need for a local currency exchange.
Thirdly, adopting Coinbase as a payment gateway has helped us reduce transaction costs. With traditional payment methods such as credit cards and bank transfers, there are often high transaction fees and exchange rates. However, with Coinbase, we are able to offer our clients lower transaction fees, which ultimately benefits both us and our clients.
Finally, Coinbase's reputation as a leading cryptocurrency exchange provides added credibility to our SMM services. By partnering with Coinbase, we are able to offer our clients a trusted and reputable payment option, which enhances their confidence in our services.
In conclusion, adopting Coinbase as a payment gateway on our SMM website has been a strategic decision that has allowed us to offer our clients a safe, flexible, and cost-effective payment option. With its advanced security features, multiple cryptocurrency options, and low transaction fees, Coinbase has become an integral part of our payment processing system. As the world of digital payments continues to evolve, we believe that partnering with leading payment gateways such as Coinbase will remain essential for businesses in the digital age.
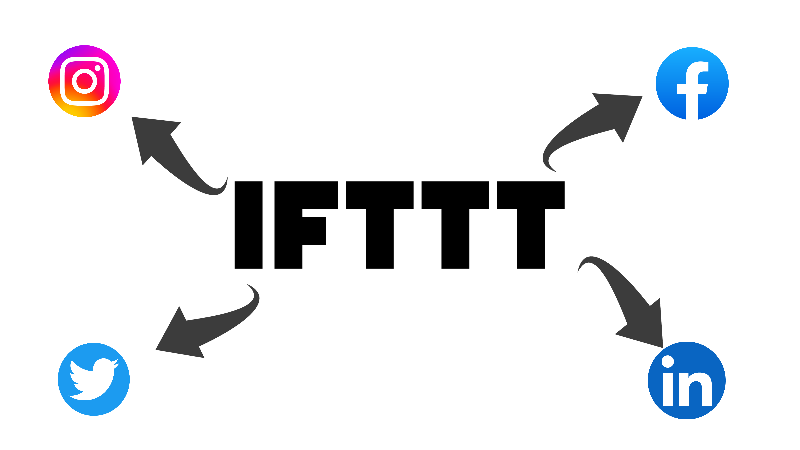
How To Autopost From RSS To Social Media Using IFTTT
In today's digital age, social media is a vital tool for marketing and communication. However, it can be time-consuming to manually post updates to multiple platforms. One solution is to use an RSS feed to automatically post to social media using IFTTT (If This Then That). In this article, we will explore how to set up this automation and make the most of it.
What is an RSS feed?
RSS (Really Simple Syndication) is a format used for distributing web content. It allows users to subscribe to a website's updates and receive them in a standardized format. RSS feeds can be read using RSS readers or aggregators, which collect content from multiple sources and present it in a unified format.
How to use IFTTT to post from RSS feed to social media?
IFTTT is a web-based service that allows users to create simple automation tasks called applets. An applet consists of two parts: a trigger and an action. The trigger is an event that initiates the applet, while the action is what happens when the trigger occurs. To post from an RSS feed to social media using IFTTT, we need to create an applet that triggers when a new item is added to the RSS feed and posts it to the desired social media platform.
Step 1: Create an IFTTT account
The first step is to create an account on the IFTTT website. You can do this by visiting https://ifttt.com and clicking on the "Sign Up" button in the top right corner. You will be prompted to enter your email address, username, and password. Once you have created an account, you can log in and start creating applets.
Step 2: Connect RSS feed and social media accounts
Before creating an applet, we need to connect our RSS feed and social media accounts to IFTTT. To do this, click on the "My Applets" button at the top of the screen and then click on "Services" in the menu that appears. Here you can search for the services you want to connect, such as Feed and Twitter, and follow the prompts to authorize IFTTT to access them.
Step 3: Create a new applet
Once you have connected your RSS feed and social media accounts, you can create a new applet. To do this, click on the "My Applets" button again and then click on the "New Applet" button. You will be prompted to select a trigger service, which in this case is the RSS feed. Choose the "New feed item" trigger and enter the URL of your RSS feed. You can test the trigger to make sure it is working correctly.
Step 4: Set up the action
After setting up the trigger, we need to set up the action, which is to post the new item to the desired social media platform. To do this, click on the "That" button and choose the social media platform you want to post to, such as Twitter or Facebook. Follow the prompts to authorize IFTTT to access your account and then choose the action you want to perform, such as "Post a tweet" or "Create a status message". You can customize the message that will be posted by using the ingredients provided by IFTTT, such as the title or content of the RSS feed item.
Step 5: Activate the applet
Once you have set up the trigger and action, you can activate the applet by clicking on the "Finish" button. You can then test the applet by adding a new item to your RSS feed and checking if it is posted to your social media account. If everything is working correctly, your RSS feed updates will now be automatically posted to your specified social media accounts.

How To Create A YouTube Channel, For Beginners
Creating a YouTube channel is a simple process that allows you to share videos with a wide audience. Whether you're a business owner, content creator, or just looking to share your passions and interests with others, a YouTube channel can be a great platform for reaching and engaging with an audience. Here's how to create a YouTube channel:
- First, you will need to have a Google account since YouTube is owned by Google. If you already have a Gmail account or use other Google services, you can use the same login information to create a YouTube channel. If you don't have a Google account, you can create one for free by visiting the Google Account creation page and following the prompts.
- Once you have a Google account, visit the YouTube website and sign in.
- Click on the user icon in the top right corner of the screen and select "My channel" from the dropdown menu.
- You will be prompted to choose a name for your YouTube channel. This can be your own name, the name of your business, or any other name that represents your brand or content.
- Next, you will need to add a profile picture and cover photo for your channel. These images should be high quality and represent your brand or content. You can either upload your own images or choose from YouTube's stock images.
- Once you have chosen a name and added your profile and cover images, click "Create channel." Your YouTube channel is now live and ready for you to start uploading videos.
- To upload a video, click on the camera icon in the top right corner of the screen and select "upload video." You can then choose a video file from your computer or device to upload.
- As you start uploading videos, you can customize your channel further by adding a channel description, creating playlists, and enabling comments and likes. You can also use YouTube's Creator Studio to manage and track your channel's performance.
By following these steps, you can easily create a YouTube channel and start sharing your videos with a global audience. Whether you're looking to share personal videos or build a professional brand, YouTube is a powerful platform for reaching and engaging with viewers.

How To Get Instagram Blue Tick Verified
Getting a blue tick verification on Instagram is a coveted status symbol that signifies authenticity and credibility on the platform. A verified account is more likely to be followed and trusted by other users, which can increase your reach and impact on the platform. Here's a guide on how to get verified on Instagram.
1. Make sure your account is eligible for verification.
To be eligible for verification, your account must meet the following criteria:
- Your account must be active, with a complete profile and profile picture.
- Your account must be public and not switched to private mode.
- Your account must not have a history of breaking Instagram's community guidelines.
- Your account must be in good standing and not be at risk of being disabled.
- Make sure your account represents a notable person or brand.
Instagram verifies accounts of high-profile individuals and brands in the fields of fashion, beauty, entertainment, sports, music, government, politics, religion, journalism, media, business, and other key areas of interest. If your account is not related to any of these categories, it may not be eligible for verification.
2. Complete your profile and make it professional.
Your profile should reflect the type of content you post and be consistent with your brand or personal image. Make sure to include a profile picture and bio that accurately describes your account and what you do. Use keywords relevant to your niche or field to make it easier for people to find you.
3. Build a strong following.
The more followers you have, the more likely you are to be verified. Focus on creating high-quality, engaging content that your followers will enjoy and share. Interact with your followers and respond to their comments and messages. Collaborate with other influencers and brands in your niche to expand your reach.
4. Be active on Instagram.
Post regularly and consistently to keep your followers engaged and interested in your content. Try to post at times when your followers are most active, and consider using Instagram's scheduling feature to plan your posts in advance.
5. Request verification through Instagram.
To request verification, go to your Instagram account's settings, select "Request Verification," and complete the form with your full name, username, and a copy of your government-issued ID. Make sure to provide a clear, high-resolution photo of your ID, and ensure that all the information on it matches the information on your Instagram account.
6. Wait for Instagram's response.
Once you've submitted your verification request, it can take several weeks or even months for Instagram to review and respond to your request. If your request is approved, you will receive a notification from Instagram with instructions on how to complete the verification process.
7. Keep your account in good standing.
To maintain your verified status, it's important to keep your account in good standing by following Instagram's community guidelines and terms of use. Avoid posting inappropriate or spammy content, and be mindful of the way you interact with other users on the platform.
In conclusion, getting verified on Instagram is a process that requires a combination of meeting the eligibility criteria, having a professional profile, building a strong following, being active on the platform, and making a request through Instagram. While it may take time and effort to get verified, it's worth it to establish your credibility and reach a wider audience on the platform.
How To Create A LinkedIn Business/Company Page
Creating a LinkedIn business page is a great way to promote your company and its products or services to a professional audience. Here's a step-by-step guide on how to create a LinkedIn business page:
- Go to the LinkedIn homepage and click on the "Work" dropdown menu in the top right corner. Then select "Create a Company Page" from the menu.
- You will be taken to a page where you can enter your company's name, website, and industry. Make sure to choose the correct industry category as it will help LinkedIn users find your company more easily.
- Click "Continue" to proceed to the next step, where you will be asked to provide a brief description of your company. Keep it brief and to the point, highlighting the main products or services your company offers.
- The next step is to upload a profile picture for your company. This should be a high-quality image that represents your brand, such as your company logo.
- Next, you can add a cover photo to your LinkedIn business page. This should be a larger image that represents your company and its culture.
- Once you have completed these steps, click "Create Page" to create your LinkedIn business page.
- After your page is created, you can start adding more information to it. You can add details about your company's history, mission, and values, as well as information about your products or services.
- You can also start building your company's network by adding employees as "followers" of your LinkedIn business page. This will help increase the visibility of your company and its products or services to a wider audience.
- To help promote your LinkedIn business page, you can share updates and news about your company on the page. You can also share relevant articles, blog posts, and other content to help establish your company as an industry leader and thought leader.
- You can also use LinkedIn's advertising tools to promote your business page to a specific target audience. You can create sponsored content or sponsored InMail to reach specific users or target specific industries or job titles.
- Finally, don't forget to regularly update your LinkedIn business page with fresh content and engage with your followers by responding to comments and messages. This will help keep your page active and relevant, and help you build a strong online presence for your company.
In conclusion, creating a LinkedIn business page is an important step for promoting your company and its products or services to a professional audience. By following these steps and regularly updating your page with fresh content, you can build a strong online presence for your business on LinkedIn.
Top 5 Best SMM Panels In Nigeria
Social media marketing (SMM) is a popular marketing strategy that involves promoting a business or brand through social media platforms like Facebook, Instagram, and Twitter. In Nigeria, there are several SMM panels that offer services such as automatic likes, followers, and views for social media accounts. In this article, we will discuss the top 5 best SMM panels in Nigeria.
1. SMMBirds: SMMBirds is a top SMM panel in Nigeria that offers a wide range of services for various social media platforms, including Instagram, Facebook, and Twitter. They offer automatic likes, followers, views, and even custom comments for a variety of different packages. They have a user-friendly interface and offer the best 24/7 customer support.
2. Boostlike: Boostlike is a well-known social media management panel in Nigeria that offers a wide range of services for platforms like Instagram, Facebook, and Twitter. These services include automatic likes, followers, views, and custom comments in various packages. Boostlike boasts a user-friendly interface and around-the-clock customer service.
3. Socialplus: Socialplus is a prominent Nigerian SMM panel that provides a variety of services for social media platforms including Instagram, Facebook, and Twitter. These services include automatic likes, followers, views, and custom comments in different packages. Socialplus has an easy-to-use interface and offers continuous customer support.
4. BestCheapLikes: BestCheapLikes is a prominent Nigerian SMM panel that provides a variety of services for social media platforms including Instagram, Facebook, and Twitter. These services include automatic likes, followers, views, and custom comments in different packages. BestCheapLikes has an easy-to-use interface and offers continuous customer support.
5. SocialMediaExpert: SocialMediaExpert is a highly reputable SMM panel in Nigeria that offers a wide range of services for various social media platforms. They offer automatic likes, followers, views, and even custom comments for a variety of different packages. They also have a user-friendly interface and offer 24/7 customer support.
In conclusion, there are several SMM panels in Nigeria that offer a variety of services for social media platforms. The top 5 best SMM panels in Nigeria, as discussed in this article, are SMMBirds, Socialplus, BestCheapLikes, SocialMediaExpert, and Boostlike. These panels offer automatic likes, followers, views, and even custom comments for a variety of different packages, and they all have user-friendly interfaces and offer 24/7 customer support.

How To Make Money Reselling Social Media Services From SMMBirds
Making money reselling social media services can be a lucrative business, especially if you are able to find a reliable and trustworthy supplier. One of such supplier is SMMBirds which offers a wide range of social media marketing services including followers, likes, views, and comments. In this article, we will discuss how you can make money by reselling these services to your own clients.
Step 1: Choose a niche
Before you start reselling social media services, it's important to identify your target market. This could be small businesses, influencers, or even individuals who want to increase their online presence. Once you have identified your target market, you can tailor your marketing efforts to their specific needs and preferences.
Step 2: Find a reliable supplier
Finding a reliable supplier is crucial to the success of your business. You want to work with a company that has a proven track record of delivering high-quality services at affordable prices. SMMBirds is a reputable supplier that has been in business for several years and has a solid reputation in the industry.
Step 3: Set your prices
Once you have found a reliable supplier, the next step is to set your prices. You will need to consider the cost of the services you are reselling, as well as any additional fees you may incur, such as payment processing fees. It's important to strike a balance between offering competitive prices and making a profit. Let's say we sell a thousand Instagram followers for ₦200, you can resell to others at ₦1000, making you a gain of ₦800.
Step 4: Promote your services
Now that you have everything in place, it's time to start promoting your services. There are a number of ways you can do this, including social media, online classifieds, and local advertising. You could also consider reaching out to potential clients directly through email or phone.
Step 5: Provide excellent customer service
Providing excellent customer service is key to building a successful business. This includes responding promptly to inquiries, following up with clients to ensure their satisfaction, and offering support if any issues arise. By going above and beyond for your clients, you can build a loyal customer base that will help your business grow.
In conclusion, reselling social media services can be a lucrative business if you are able to find a reliable supplier, set competitive prices, and provide excellent customer service.
SMMBirds is a reputable supplier that offers a wide range of social media marketing services, making it a great choice for anyone looking to enter this market. By following the steps outlined in this article, you can set up a successful business reselling social media services and start making money online.
How to find and copy your unique Instagram profile URL link
Instagram is a popular social media platform that allows users to share photos and videos, interact with friends, and build a community of followers. If you want to share your Instagram profile with others, you will need to find your Instagram profile URL. This is the unique web address that links directly to your profile page. Here's how to find and copy your Instagram profile URL:
1. Open the Instagram app on your mobile device or log in to Instagram on your computer.
2. Navigate to your profile page by tapping on the profile icon in the bottom right corner of the app (on mobile) or by clicking on your profile picture in the top right corner of the screen (on desktop).
3. Once you're on your profile page, tap or click on the "Edit Profile" button.
4. Scroll down to the bottom of the page and you will see your Instagram profile URL. It will be a combination of your username and the word "instagram.com." For example, if your username is "johndoe," your Instagram profile URL would be "instagram.com/johndoe."
5. To copy your Instagram profile URL, simply tap and hold on the URL or right-click and select "Copy" (on desktop). You can then paste the URL wherever you want to share it, such as in an email, on a social media platform, or when you you want to order a service.
Keep in mind that your Instagram profile URL is not the same as the link to a specific post. If you want to share a specific post, you will need to tap or click on the post and then tap or click on the three dots in the top right corner of the post. From there, you can select "Copy Link" to copy the link to that specific post.
By following these steps, you can easily find and copy your Instagram profile URL to share with others. This is a useful feature if you want to promote your Instagram account or make it easier for people to find and follow you on the platform.

